

cmiVFX: Blender Massive Mammoth Masterclass: Rigging V1 & V2

cmiVFX: Blender Massive Mammoth Masterclass: Rigging V1 & V2
English | Video: h264, yuv420p, 1024x820, 499 kb/s | Audio: aac, 22050 Hz | 1.7 Gb
Genre: eLearning
It's been about 2 years now since the frost Blender Mammoth training came into the world during the release of Blender 2.49. A lot has changed and it's a new era, the age of Blender 2.5! That's why we are stepping up and finally bringing the Mammoth to life! This resurrection will happen in a series of videos, recorded by some the most talented and famous Blender Artists around. That's why we are extremely proud to introduce the Massive Mammoth Masterclass!
The first, dual video kit, will cover rigging and weighting and will be presented by Nathan Vegdahl, the lead rigger of the Blender Foundation's open movies Big Buck Bunny and Sintel. In over 6 hours you will learn the secrets of perfect weighting, efficient control rigs and shape keys. This is the perfect foundation for the upcoming sequels of this tutorial series, which will cover animation and scene-setup.
Contents Descriptions
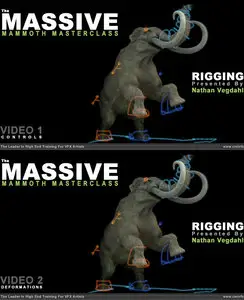
Volume 1:
Rigging Video 1: Controls
Because of the sheer length and amount of information this tutorial is split into 2 parts. The first part will cover some essential rigging concepts, the setup of the deformation rig and creating an animator-friendly control rig with custom bone shapes. The second part of this tutorial has originally been a part of the first video and covers weighting, corrective shape keys and non-corrective shape keys. That way you can decide if you are only interested in the actual bone setup and controls and just watch video 1 of this tutorial. Or, if you are only interested the weighting process, you can watch only video 2. But if you want to learn the whole thing, get the bundle and watch both!Every model has it's own challenges! With careful planning you can save yourself a good amount of work. Before you even start rigging you should familiarize yourself with the model. Think about where you can skimp a little bit and where you might have to come up with some more advanced solutions.
Divide And Conquer
You don't have to go and do everything at once. By dividing your rig into different sections and finding solutions for one problem at a time you won't run the risk of getting confused and loosing overview.
Twist Bone And Parent Switch
In this divide and conquer approach, Nathan shows you how to setup arms with convincing twisting deformations by making use of the damped track constraint. Being able to choose whether a bone should rotate with its parent is an important option for animators, but with Nathan's Parent Switch that will be easy to control!
IK/FK
One of the most important concepts of rigging is the setup of forward and inverse kinematics. A lot of times the arms of a character will be animated using forward kinematics, while the legs are being controlled with inverse kinematics. But especially on a quadruped like our Mammoth you need to be able to use both and dynamically choose between FK and IK. In this tutorial you will learn how to use custom properties and driven constraints to create an easy to control IK/FK Switch.
Spline IK
One obvious challenge you have to deal with when you are rigging an elephant or a Mammoth is creating controls for the trunk that the animator can use efficiently. This is where Blender's SplineIK comes in handy. Bezier Curves are used to guide the inverse kinematics of this special constraint. Combined with an IK/FK switch this will allow you to setup a comfortable trunk rig.
Brining It All Together
After you have solved the different problems of the Mammoth rig one by one, you can bring it all together by creating the actual rig. First you create the deform-rig that will actually deform the mesh and that the animator won't touch. When that is done it's time for the weighting. There are different ways to do that, automatic weights, weight-painting and manual weighting, with automatic weights being the quick and dirty way and manual weighting the most precise albeit tedious. We went for the precise way which takes a lot of time and is a challenge of it's own, that's why we decided to put that in a separate video and focus just on the bone setup in this one.
The Control Rig
Finally we assemble all the different rigging methods we learned in this tutorial and create the control rig for the animator: IK/FK switch, SplineIK, isolate controls with switchable parents, and driven constraint setups with custom properties. And to polish the whole thing Nathan shows you how to setup custom shapes for the bones.
Volume 2:
Rigging Video 2: Deformations
Segment Weighting
For a clean start we'll weight the mesh in segments. Even though the resulting deformations will look horrible it will give you a lot more control over what exactly which part of the mesh is assigned to which bone. With the smooth automatic weighting it would really be hard to keep track of which vertices are being deformed by which bone.
Test Poses
This is the point where you will finally see the Mammoth moving! Setting up test poses after the segment weighting will help you to check out the actual deformations without having to constantly move the bones manually.
Cross Sections
The most tedious and difficult part of the whole weighting process is getting the vertex groups to deform exactly the way you want it. To have the maximum control over the deformations we will literally weight every single point manually. But don't worry, there are ways to make this easier, and that is working in cross-sections.
Mirror Weights
Just like in modeling you probably only want to do this whole weighting process o one side of the mesh. Blender has some great tools to help you with this and mirror the weights. However, that works only with perfectly symmetric models, which unfortunately is not the case with our Mammoth. Due to some inaccuracies during the sculpting process of the first tutorial from the Mammoth series there are some slight asymmetries in the mesh. Luckily Nathan has written an add-on to overcome these problems!
Patch Weighting
Another add-on that comes with this tutorial lets you interpolate weights between different vertices. This allows us to fill in the weights between the cross-sections.
Corrective Shape Keys
Although we now have some pretty darn good looking deformations there are some areas that could still be improved. Here's where we will use Blender's sculpting and modeling tools to create corrective shape-keys. Once set up you don't have to care about them any longer, with the help of drivers they will automatically be triggered by the according bone-movements.
Facial Shape Keys
Not everything has to be animated with bones. Some facial movements like eyebrows and lids can be animated with shape keys, that you control with animatable custom properties.
Project Contents
All cmiVFX videos come with all the training materials you can need right from our website. No matter what time of day, your location, or how your feeling, cmiVFX will be there waiting for you!